


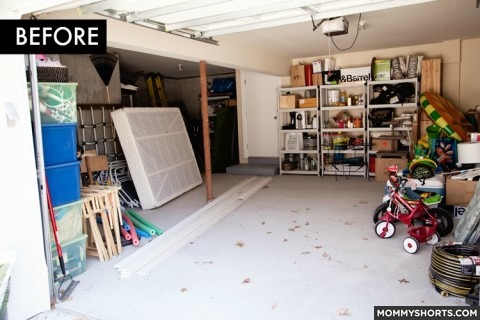
I spend a lot of time at my friend Seri’s house, which is always beyond lovely, but this summer there was a brand new addition that made it even more envy inducing.
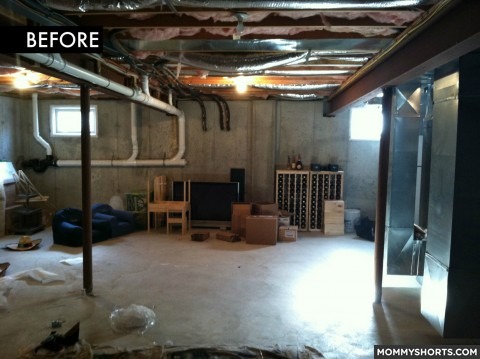
They redid their basement.
Now. When my parents redid the basement of our house while I was growing up, they painted the walls and threw down something resembling plastic grass on the floor.
Seri had a more sophisticated vision for her basement.
Seri’s vision:
• I wanted an open space where the kids could play. The toys were piling up in our living room upstairs (train tables, LEGOs, a lemonade stand, etc.) and they needed a new home.
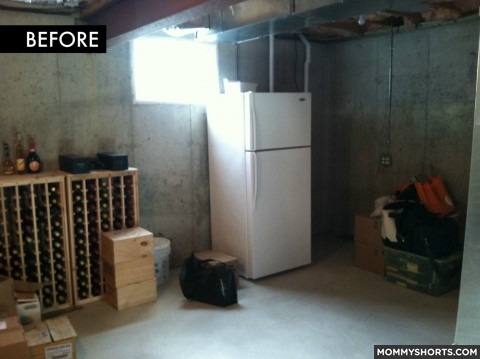
• I needed a proper storage for my party supplies, which have really built up over the years since I started my Little Miss Party business.
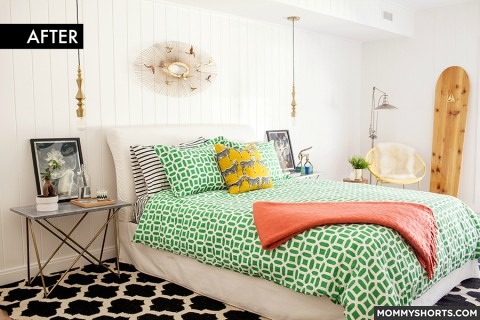
• I wanted to convert a section of the basement to a guest room that would feel private from the rest of the house. We have guests stay with us often and I think it’s nice for them not to get woken by our kids.
• In addition to a play space for the kids, I wanted it to be a place I could entertain friends. I wanted the basement to look and feel like a really cool space, not just a typical basement.
Stunning, right?
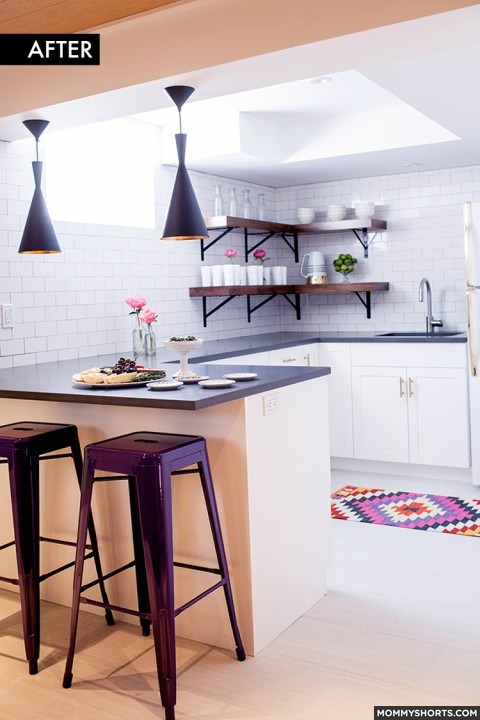
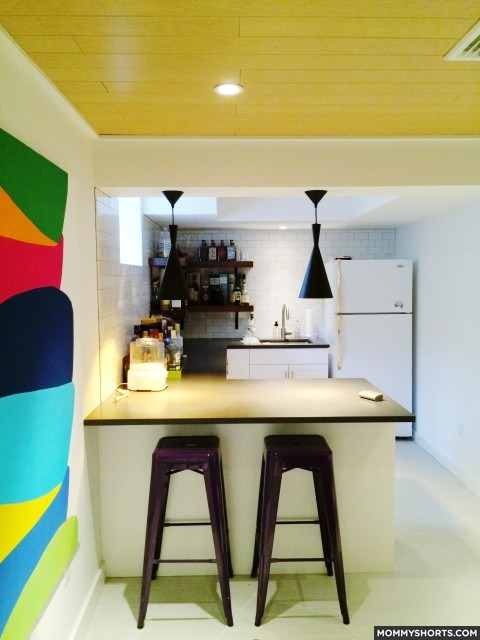
Not only is it an awesome place to throw the kids on a rainy day while you do god knows what upstairs, it’s also a great place to hang out with friends once the kids are in bed, thanks to the full kitchen and bar.
And, since one side of the garage was converted into a guest room, you can also stuff unwanted in-laws down there when they come to visit!
The space was designed by my good friend Lisa of Abaca Interiors, who you might remember helped me decorate my summer house last year.
Clearly, she is still the person you call when you want a chic yet kid-friendly space.
Here are some of Lisa’s tips and solutions for the space.
Maintain the feeling of openness by creating shallow built-in storage.
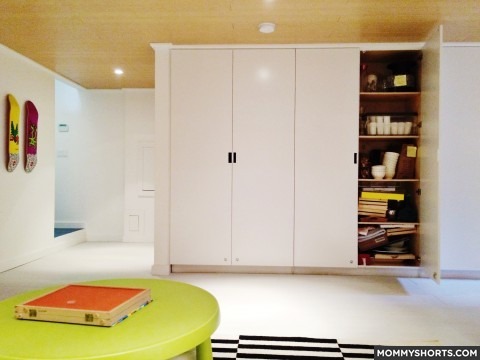
The built-in storage is shallow, but long – there are 22′ of closets and at a depth of 20″ each. The shallow depth not only preserves floor space, it makes it easier to organize and not lose track of what’s inside.
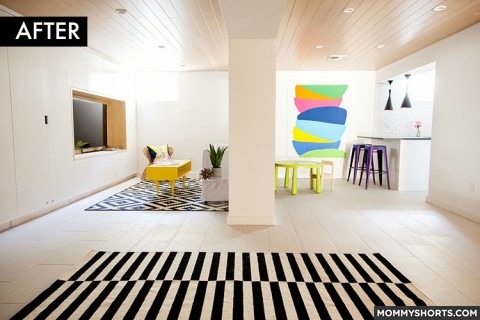
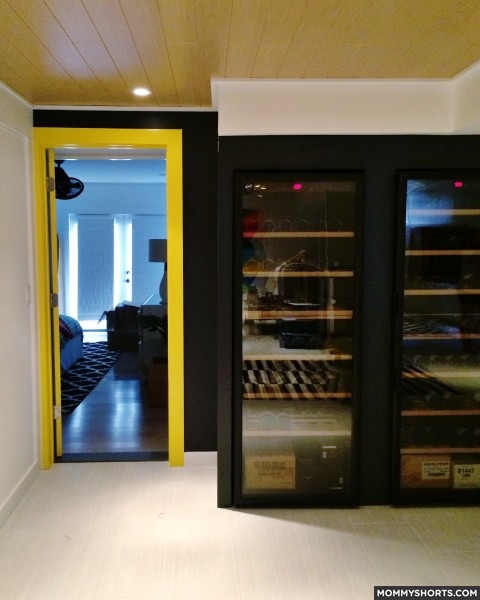
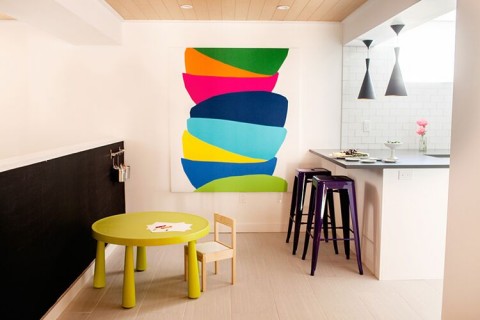
Use pops of bright color to help define the different areas of the room.
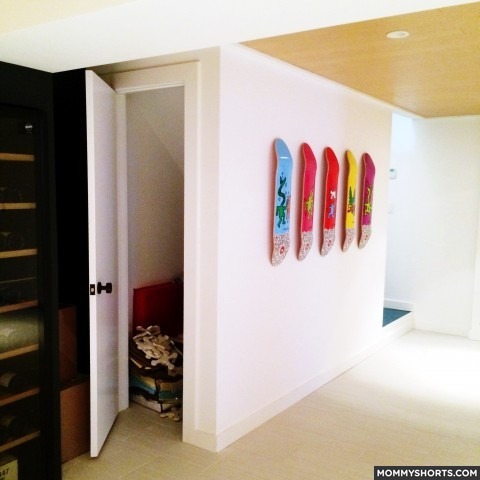
Pops of bright color, like the artwork near the wet bar, the Keith Haring skateboards, and the yellow door leading to the guest room, are used sparingly and placed along the perimeter of the space.
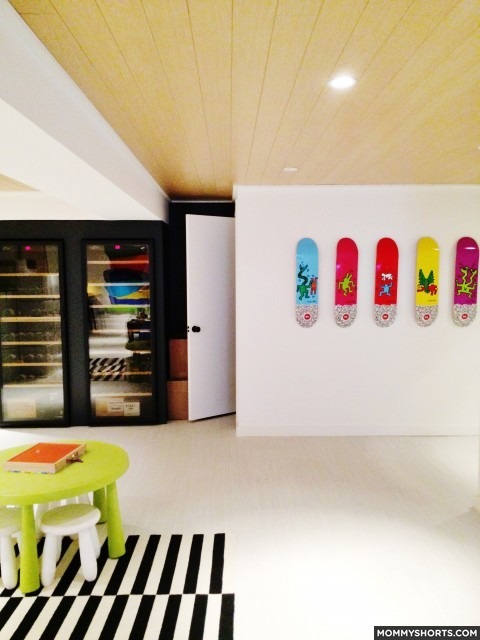
Since color is used so sparingly, it helps define the different areas by leading the viewer’s eye around the room. This helps make the space to feel larger than it actually is. The color also injects an important dose of personality and prevents the space from looking too stark.
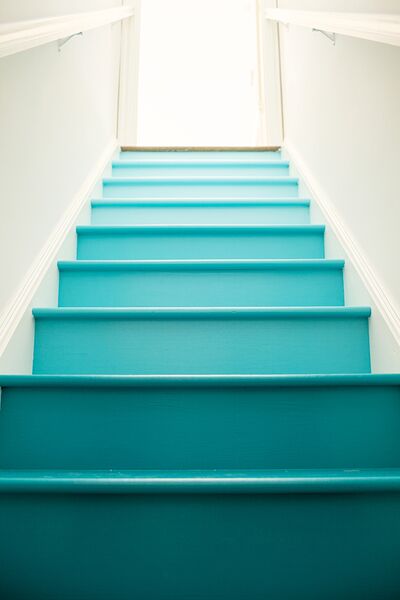
Use cost effective details for big effects.
We painted the steps ombré leading down to the basement which was a great way to transition from the more traditional upstairs to the modern basement. You can read more detail on how to pull off this look here.
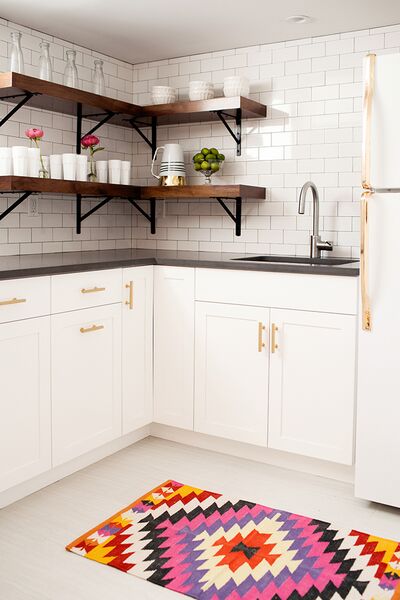
Seri already had a fridge in the basement and didn’t feel the need to buy a new one, so we glammed it up with some shiny gold duct tape on the silver hardware.
Find space savers for typically overlooked places.
I like to utilize spaces that are often overlooked, like the space beneath the stairs, for additional storage to house larger items that Seri does not need to access regularly.
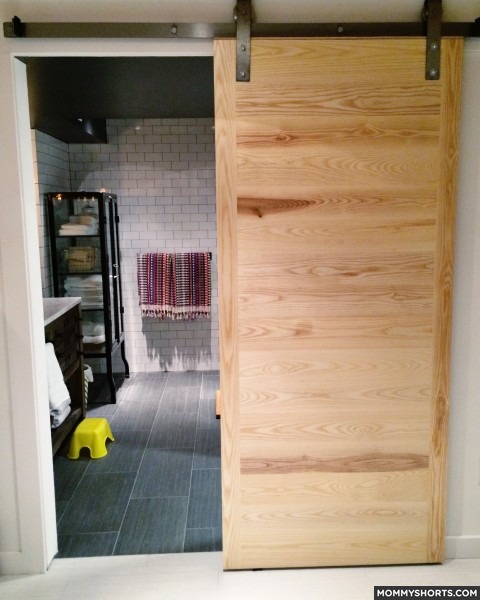
I also suggested barn doors for the utility room and the bathroom. The sliding doors give a sleeker, more streamlined look than traditional doors and take up less space.
Instead of taking space from the basement to make a guest room, we turned a garage bay that Seri was not using into a guest room with an entry that is separate from the rest of the house.

Try a monochromatic color scheme.
The colors in the space range from stark white to pitch black. The use of a single hue helps make the space feel calm and peaceful, despite the few pops of bright color throughout.
The use of light woods, like those on the ceiling and the custom barn doors, adds an organic roughness to the space and softens the overall look.
Create a purposeful home for big toys you can’t put away.
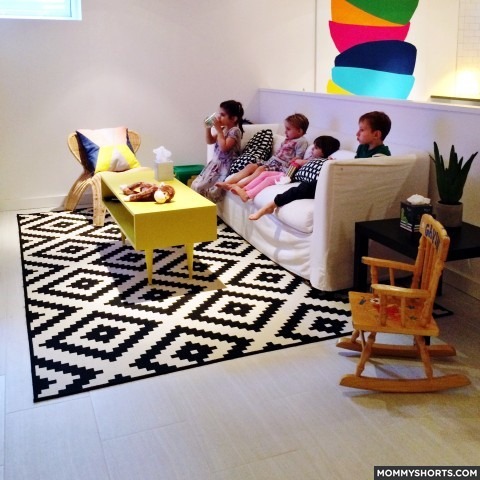
We built a low wall to section off the sit-down TV area from the play area. This way the TV area can be kept clutter-free while the other side of the wall is designated for toys. The play area is on the opposite side of the room from the entrance, so you don’t see the clutter of toys when you walk in.
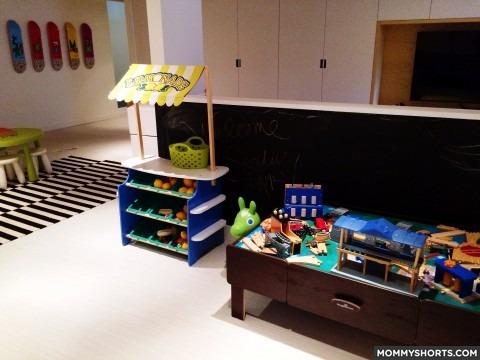
We painted the back of the wall in black chalkboard creating something that looked modern but is ultimately meant for the kids.
Make sure the materials you use are basement-friendly.
One of the most important things for Seri was for the space not to feel “basement-y”. However, we still had to keep in mind that basements are frequent sources of dampness and leaks, so only certain finishing materials are appropriate. We used a hard-wearing, large format ceramic tile on the floor, which is able to hold up to kids and withstand basement dampness.
On the ceiling, we confined the lowest ductwork to drywall soffits and used laminate planks made to look like wood for the remainder of the ceiling. So while the ceiling looks like a continuous surface, it actually provides easy access to the pipes and ductwork in case of a leak.
Also, for everyone wondering about using a white couch for a playroom— the couch is actually Seri’s old couch from their upstairs living room. It’s also a slip cover so they easily wash or replace it.
Finally, we made sure that storage was incorporated in every area possible. Besides the 22′ of built-in closet space, there is storage beneath the stairs, ample cabinetry and open shelving in the kitchen, and two large closets in the guest room.
Now. Don’t you have basement envy?
—————————–
Space: Seri from Little Miss Party
Design: Lisa from Abaca Interiors
Photography: Raquel Langworthy


WOW.
Well doesn’t this look fantastic….?! Love the post! xx
Not sure I would be keen on a black/white rug and a white sofa with my kids. Or myself, for that matter. Spills hide best under dark colours. But it’s a lovely renovation.
Yes. Yes I do.
How come the before picture is a garage and all the after are of a real basement? Always the same in this sites.
You’re right. I just added more before pictures so you should be able to see everything clearly now. The garage was what was converted into the guest room.
Someday! I have a basement just waiting to be finished!!
Drooool. We redid our basement last fall and while it came out beautifully, it’s nothing like this. That kitchen is bigger than our regular kitchen upstairs! Of course, it would have helped a lot if we had a much bigger budget and an interior designer.
holy crap. HOLY CRAP. That kitchen is what I want my upstairs kitchen to be. Holy crap.
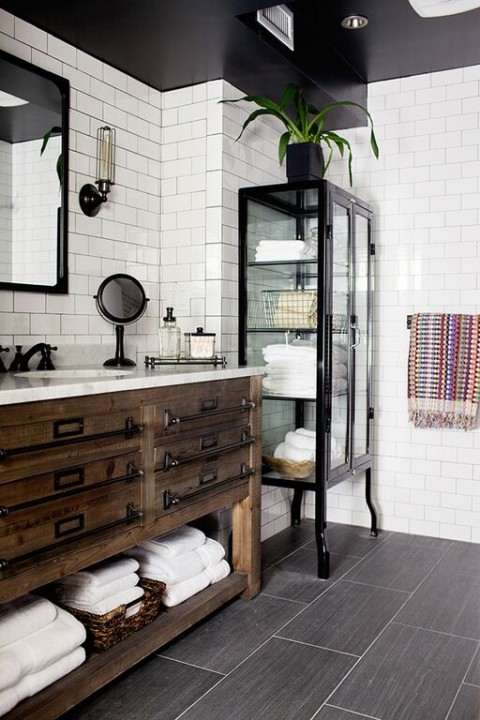
Love!!! Where is the glass storage cabinet from in the bathroom?
It is from Restoration Hardware 😉
This is GORGEOUS! Can you explain the ceiling more? Are they wood laminate planks or vinyl laminate? What are they attached to? And how are they easy access to the pipes? Typically laminate has a lip that tucks under the next piece. Thanks!
Why, thank you!! Here’s a link to the product we used for the ceilings:
http://www.armstrong.com/residential-ceilings/ceiling/woodhaven-1267-plank/14149-97122
Hope this helps!
I am thinking of doing a sliding barn door for my bathroom. How do you feel it works with privacy (a lock, various noises from the bathroom, etc…)
Thanks!
Maggie, I stayed in a hotel with barn doors for the bathroom. I really, really did NOT like it. There is still quite a crack between the wall and the door and I felt as if I didn’t have any privacy. Plus, there was no lock on the barn door. (Maybe there is a way to have one, but this door didn’t.)
I could see it between a library and main room, b a bathroom needs privacy!
STUNNING! And lots of great ideas. Two things: Where is that massive beautiful print from (the colorful stacked bowls)? And can we see the rest of the house? 😉
Thank you! The print is a Marimekko fabric that we had stretched to hang on the wall. You can see Seri’s studio on her blog here:
http://littlemisspartyplanner.com/blog/blog/little-miss-mommy/office-chic/
do you know where the color block pillow in the living room came from?
[…] Source […]
The picture explains everything, thanks for sharing.
I have expressed a few of the articles on your blog now, and I really like your style of blogging. I added it to my favorite’s blog site list and will be checking back soon. http://finishedbasementkanata.com/
great idea! your information is very helpful.Thanks for sharing this article
Thanks for sharing this write up with us. Really useful and helpful .
great Post! your information is very helpful.Thanks for sharing this article
I made a bedroom as shown. it have changed the house alot from a kids room to an extra guestroom it is a good use
Thank you for sharing this article. Everything is best in your article and your blogging style is different.
Great ideas and content. Helpful and practical.
Fantastic basement ideas, thanku..
Great content. Thankyou for posting. i liked a lot of small details and will surely try them out at my home.